Tuesday 27 August 2013

Basket of Blessing

Hi to all the lovely Bloggers out there!

Hope you are all very well and happy! Well today I need to share  some of the lovely sunshine we have been having in Cockburnspath! I just love the Sun! All the lovely Bees and the birds the sounds of the garden is so calming and so beautiful! I just love Mother Nature! When I was taking my photos there came a bee and sat on 1 of my flowers in my image, unfortunately I was just that second to slow to capture it in a picture. So it decided to come and sit on my camera while I was taken pictures.

Well it is Tuesday and another lovely challenge from SweetStamps.com

We have another Fab Challenge for you all this week

and it is.......


We'd love to see your Creations, so come and join us and have some fun with us 

You could win a $20 shopping spree for goodies at

SweetStamps.com's online store just by playing along!!

Click here for our complete Challenge Rules.


We have another Technique Challenge once a month and is ending on the 14 September. 

The theme for that challenge is Masking Technique 

***********

Here is my Recipe!

I am so into folded cards these days and is having fun!

Well I made a Stepper card with White Linen Card Stock
I layered it with a heavy Yellow Gingham Card Stock

Added RicRac on top of the ribbon to the bottom of the front stepper
and the top of the back step. 


I positioned and glued my flowers to give dimension and depth to the
basket

Did the same on the step of the stepper card too.

Added a double bow to the basket


Stepper from the side


I stamped this lovely combo of stamps from SweetStamps.com several times


Colored it in with my Promarkers and cut it all out and shaped them with a Embossing tool

Promarkers:
Canary, Soft Lime, Gold, Bright Orange
Apple Cider, Olive Green, March Green
Cocoa, Vanilla and Caramel


These lovely Butterflies are from Cheery Lynn Designs 


I added a bit of bling to the bodice and the antennas


I created a banner that has been held by the 2 butterflies

This lovely sentiment goes so well with this basket and flowers


I added a bow in the middle of these 2 Garlands to give the illusion that the 2 garlands
is held together with the bow in the middle 


 Well I hope you enjoyed this project of mine and hope I could be of some inspiration to you!

Thank you again for taking the time out of your busy lives to visit my blog!
I would love comments and 
why not become a follower if you are not one yet! 
I would love that
xoxox


I am going to enter this project into the following Challenges:

Make it Monday - W - Anything Goes C#155 (77) 1/9
A Gem of a Challenge - Something with the  letter "B" C#94 (135) 1/9 "B" for Butterflies
Totally Gorjuss  - Bows C#198 (69) 1/9
Charisma Cardz - More than 1 Fold C#33 (43) 29/9
QKR Stampede  - AG C#53 (126) 29/9
My Craft Creations 26/8 - 7/9 - Butterflies (8) 7/9


To be updated.

Tuesday 20 August 2013

Wedding Blizzz!

Hi all your lovely Bloggers!

Well it is Tuesday again and I had so much fun playing with my new ArtsyFartsy Stamps from SweetStamps.com and my lovely new Dies by Cheery Lynn Designs.

It is Tuesday and another challenge across at 

SweetStamps Challenge #131 

and the theme is

We'd love to see your Creations, so come and join the fun with us at 


You could win a $20 shopping spree for goodies at

SweetStamps.com's online store just by playing along!!

Click here for our complete Challenge Rules.


We have another Technique Challenge once a month and is ending on the 14 September. 

The theme for that challenge is Masking Technique 

***********

Here is my Recipe!


I decides to make a wedding card using these lovely new Stamps from SweetStamps.com
ArtsyFartsy Clear Stamp Sets
I used Hammered Cards Stock as my base
Layered it with Dotted Glitter Card


This is the card closed, but I struggled to get a proper photo because
of the flowers in the inside
These lovely dies is my new dies I have just received from 
SweetStamps.com and it is by 
Cheery Lynn Designs
I added White Pearls to the 8 corners and to the middle
These dies give the illusion of a door!

Well I think so LOL!!!!

 
Well I hope you can see the close up of my two Flaps the L-hand and the R-hand
They joined in the middle


These two lovely new stamps Bodice is from the Clear ArtsyFartsy Set
I used Versamark to stamp and Embossed it with the lovely


My inside is the main part of my Gate fold Card
I cut the 4 corner dies and layered my image on Pearl Card
Added some flowers


These lovely corner dies is also by Cheery Lynn Designs and is called
I put them in all the 4 corners on the inside and
added a Pearl to each

 Well I hope you enjoyed this project of mine and hope I could be of some inspiration to you!

Thank you again for taking the time out of your busy lives to visit my blog!
I would love comments and 
why not become a follower if you are not one yet! 
I would love that
xoxox
I am going to enter this project into the following Challenges:

Creative Craft Challenges Not a Square #17 (28) 4/9
Through The Craft Room Door A/G August 20-27 (70) 27/8
Glitter n Sparkle #46 ( 64 ) 25/8
Allsorts #220 (226) 30/8 (new: Stamps)


To be Updated

Sunday 18 August 2013

Fairy Tale In the Woods

Hi every body!

Well The weather is FAB today! Hope you all had a great weekend up to now! Well I had 2 of my Granddaughters for Friday evening and then the other 1 stayed for the rest of the weekend and did we had fun! We were crafting making jewelry and painted nails. Just all the nice girly things!

Across at Hobbycutz we have a lovely new 
Create Your Own Background!

We have a fantastic sponsor for this fortnight! 


Well here is my take on this lovely digital Image from 
Crafts and Me


Well I had real fun to create this 1! 
I used White Card stock as my base
and created my folds and cuts
I took my lazer cut images and my stamped images, measured them
and calculated my my folds and cuts
I really wanted depth with this card


Close Up


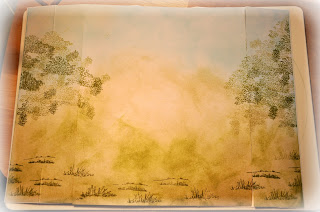
I took a Sheet of very good quality paper and
started to use my distress inks
to create my main back ground
Tim Holtz Distress Inks:
Old Paper, Peeled Paint and Broken China

I used a lovely little stamp set to create my background

Stamped randomly with 3 different coloured distress inks the leaves
and the grass bits at the bottom


Then measured and cut the back ground into 3 pieces


Glued to the main card and scored,
made the valley and mountain folds and cut were needed


I used "Fairy Tails" from Crafts and Me
She is so lovely!
After I coloured her in I cut and shaped my image to create dimention
I used lumps of SILICON to glue her down and in the front
at her feet directly onto the paper and took
the grass stamp and stamped grass over the glued area
to give the elision of the Image is part of the back ground

Promarkers used:
Vanilla, Ivory, Blush, Sunkissed Pink,
Mango, Bright Orange, Moss, Pear Green, 
Cocoa and Tan
I added these fab Lazer Cuts from Hobbycutz
to create a tree or bush behind the Image


Stamped all the tree stumps and masked some to create a bigger tree
Stamped the lovely flowers and again masked and made bigger flower bushes
Cut the stamped image out and used again lumps of silicon for dimension
This lovely Window is another FAB lazer cut and the fairy too
I added on top of the Tree trunk to create a base for my window
Above the window I added this lovely Bird on a Swirl, but glued it only on l-side
so that it could hang over the folded edge
Promarkers Used 
Tree Trunks: 
Burnt Sienna, Caramel, Tan and Vanilla

Flowers:
Pear Green, Olive Green, Moss, Marsh Green
Lipstick Red Berry Red, Canary,
Mango & Bright Orange


I love the mushroom post box and 
the little mouse trying to post his letter!
After I coloured my images in I cut and shaped it and used lumps
of siklicon hanging over the 2 folds

Promarkers Used
Mushroom:
Poppy, Lipstick Red, Cocoa, Tan
and Vanilla

Greenery and Ladybug:
Moss, Pear Green and Berry Red

Mouse:
Sandstone, Vanilla, Sunkissed Pink,
Denim blue, Aegean, Powder Blue
and Berry Red

I added another Bird with The Swirl to the r-hand side of this fold
And a few more Birds and Lazer cut Leaves


Well here is a photo taken from the side
and the completed project


 Well I hope you enjoyed this project of mine and hope I could be of some inspiration to you!

Thank you again for taking the time out of your busy lives to visit my blog!
I would love comments and 
why not become a follower if you are not one yet! 
I would love that
xoxox


I am entering into the following challenges:
Creative Craft Challenges  #17 (31) 7/9
Deep Ocean Challenge   #58 (57) 25/8
Love to Create   #79 (27) 26/8
The Paper Nest Dolls Challenge   #11 (17) 30/8
Challenges 4 Everybody  #27 (250) 30/8
Come and Get It Challenges  Things with Wings  (80) 25/8
Colour Me Creative Challenge  #75 (91) 30/8


Thursday 15 August 2013

DT Monthly Technique - Masking

My DT Card for the Monthly Technique with SweetStamps

Hi all you wonderful people out there! 

Hope you all are having a fab day today! I have been so busy in and out of Edinburgh today for meetings and just been so crazy! 

Well now I can relax and show you the fun I had with Months Technique Challenge across at SweetStamps.com!!! 

Masking!

Just a reminder that this challenge lasts until 14 September

The monthly challenge at SweetStamps Challenges is focused on techniques and will run from the 15th of the current month to the 14 of the next month.

You have a chance to win a $20 Gift Certificate to spend on lovely nice goodies at the SweetStamps.com

You get an extra chance to win when you use a SweetStamps image on your creation.

**All of these techniques and more can be found on the TUTORIALS page of our website**  

Well here is my take  on it!

My take on Masking Technique was fun to create. 
I have this lovely Stamp from ArtsyFartsy, she is called Parisienne Collage ATC AF10

well .......

I stamped her on a scrap bit of paper and cut the image out.  I stamped my Image on my main card and then placed my cut out of my image on top and stamped another stamp to create my background again. Remove the copy and WOW! 
I have masked my image! 
As easy as 1 2 3!


I used hammered card for my main card and  made a A5
I stamped my Image and layered it on Pink Card


This is a fantastic Stamp! 
She is 1 of the new stamps that SweetStamps.com
are selling and is the correct size for an ATC

The die I used is from 2 Die 4 - 119 from Hobbycutz

I distressed my edges with Tim Holtz Ink - Spun Sugar

I used Promarkers to colour just here and there in to create focal points
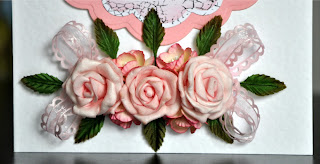
Battered Rose and Baby Pink


I added Pearls on the left and right top of my card 
to balance it out with Flowers, Leaves and Lace Ribbon below


Well I hope you enjoyed this project of mine and I hope I could be of some inspiration to you!

Thank you again for taking the time out of your busy lives to visit my blog!
I would love comments and 
why not become a follower if you are not one yet! 
I would love that
xoxox


I am going to enter this project into the following Challenges:
Craft Room Challenge   Something new (53) 7/9
Cuttin & Stampin Challenges  #33 (20) 28/8
Papertake Weekly  Flowers (101) 27/8
Craft Your Passion  #176 (59) 25/8
Dream Valley Challenges  #63 (130) 24/8


To be Updated

Tuesday 13 August 2013

The Fuchsias are in "Bling"

Happy Tuesday everybody!

Yes that is correct! It is Tuesday again and across at SweetStamps.com we have a favorite of everybody

"Bling" 
for our Challenge #130

We'd love to see your Creations, so come and join the fun with us at 


You could win a $20 shopping spree for goodies at 
online store just by playing along!!

Click here for our complete Challenge Rules.


We have another Technique Challenge once a month and is ending on the 14 August. 
The theme for that challenge is Dryer Sheet Technique 
So come and share your lovely creations with us at Sweet Stamps monthly challenge here

***********
Can you guess what is 1 of my personal favorites?
 "Bling, Pink and White"
Yes you guest correct!

I hope I can inspire all of you a bit today with my creation!

Here is my Recipe!


I used plain White card as a base and layered
it with Pink card and Glitter Dot white card
I saw this fold, sorry not to sure what it is called,
I just call it a Center Stepper Card
I saw a photo of 1 and thought I have to try this
So I used my own imagination how to create this folded card. 


My image is another lovely stamp from SweetStamps.com
Hanging Fuchsia Large 7034 J
I used Versamark Ink to stamp my image and the Embossing Powder is called Sparkle Embossing Powder
I used Promarkers to colour my Image:
Moss, Pear Green, Olive Green, Baby Pink & Rose Pink
I used after my image was completely dry my Blender Pen 
over all the Embossed areas to bring out the White again
and remove all colour.


I cut it out by hand with a scissors and a Blade
I took a ball tool and create dimension
I used Silicone to create the height to some areas of my flowers


On this photo you can see some of the Bling of the EP


This is a fantastic nest of square doilies from
Cheery Lynn Designs
DL177 French Flair Doily Stacker
I used Pearl White Card Stock 
I added Pink Pearls to the four points of my cut out die


I laid my card flat on the table and took this photo to show all the Pink Pearls I added


This is just another photo to show off the Pink Pearls

Well I hope you enjoyed this project of mine and I hope I could be of some inspiration to you!

Thank you again for taking the time out of your busy lives to visit my blog!
I would love comments and 
why not become a follower if you are not one yet! 
I would love that
xoxox
I am going to enter this project into the following Challenges:

Make it Monday - AG - #153 (50) 18/8
Challenges 4 Everybody - AG -#26 (334) 16/8
Dream Valley Challenges - Monochrome #63 (29) 24/8
Pile It On #32 (46) 17/8
Colour Me Creative Challenge - #74 (47) 16/8
One Stop Craft - Pastel Colours #238 (48) 16/8
Brown Sugar – A/G #54 (188) 16/8
Inspire Me Fridays A/G #115 (120) 16/8
Polkadoodles - #32 (21) 
Sister Act Card Challenge - A/G #19 (195) 16/8
Emma's Cards UK - Floral #19 (31)3/9
Ladybug Crafts - M, August (105) 3/9
 Mema's Challenge - 2W, A/G August (36) 3/9
The Cupboard Trilogy M, #14  (51) 3/9
Crafts and Me - 2W, 2E - #139 - (620) 21/8 
Crafty Creations - #234 (88) 14/8
Through The Craft Room Door W, 2E,  AG - (1) 20/8